Showing posts with label living room. Show all posts

Tuesday, September 21, 2010

some more fall touches

I just keep going and going and going with the fall decor, but it's still 90-stinking-degrees outside. What gives? Charleston, if you won't give me fall outside, I'm going to bring it inside. Thankyouverymuch.

Just a few little tweaks and touches to the mantel...

Some wispy little feather thingies [$0.50 at Hobby Lobby] and a Goodwill vase.


Did you see how cute this little guy is? I don't think you enjoyed him enough the last time :) And don't you love this straw broom? Dollar Tree is where it's at, my friends.


I had this ribbon draped across the mantel before, but I didn't like it. Dollar Tree ribbon, take 2!


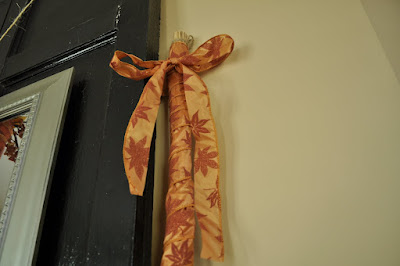
A mini grapevine wreath, wrapped in Dollar Tree ribbon with some Hobby Lobby wreath picks [piks? picks?]. Love.


Are you happy when you look at this? I sure am.

Now I just need the temp to drop about 30 degrees, so I can put my scarecrow and pumpkins on the front porch. I personally believe that you cannot appreciate a scarecrow when you're sweaty. Just sayin'.

Thursday, September 9, 2010

fall makes everything better, part 2 (mantel style)

Let me tell you something that is going to make you say (a) omg, she's my sista from anotha motha or (b) she is straight up CRAZY. I'm going to the nearest Hobby Lobby this weekend to take advantage of some sales. An hour and 45 minutes away. Am I completely insane? It's likely. SO, while I have done a little Fall sprucing here and there, what I've really been doing is making a list of things to stock up on this weekend. [!!!!!!]

In the meantime, let me show you where I am with my mantel so far. This little cutie pie comes from Pier 1, of all places. I had a gift card, but it was still $12 well spent because he is absolutely, stinkin' adorable.


Then we have my other friend, who my mom picked up for me two years ago. She's sweet like that.


And some flair, in the form of Dollar Tree ribbon.


I have big plans for the expanse above the mirror. And a few other little projects to liven up the joint. You just wait.


Until then, here you have it:


Now go get yourself an owl. You deserve it :)

Wednesday, September 1, 2010

diy ottoman

Gratuitous living room pics, coming right up :)

As you may or may not remember, I recently revealed my new and improved living room. [I'll stop bragging in a minute or two, don't you worry.] For the record, I have loved every single corner of this room. While I've waited for my office to be finished, I've been working from our dining room table, facing the living room. And I smile.all.day because it's just so happy. I lovelovelove it. Is it okay to be this mushy, gushy over something you did? Is that arrogant? I sure hope not, because I can't stop :)

Anywhoey, when I first posted those pics, a few peeps wanted to know how I constructed the ottoman/coffee table. Allow me to demonstrate...

Supplies
  • Wood for the top, cut to desired size. I used MDF and it's 35x35.
  • Legs: I scored some scrap banisters from the Habitat Store and we cut them down to size. And by that, I mean The Boy cut them down to size. I read somewhere that the top of your coffee table should be slightly shorter than the seat of your couch [2 inches shorter, maybe?] so we followed that rule when measuring.
  • L-brackets
  • Foam
  • Fabric
  • STAPLE GUN!!
Position the foam on top of the wood and cover with fabric - pull it super, duper tight and staple it along the bottom side. Paint your legs and once they're dry, you're ready to attach them to the top. We had square legs and on all four sides of each leg, attached an L-bracket. Then you can screw the L-bracket into the bottom of the tabletop to attach the legs. I need to paint over the brackets, so they don't stand out as much, but that's for another day.

Does that make sense? Probably not, but it might make sense once you get it all laid out. I hope so, because I didn't take pics of that part :)


See? Isn't it pretty? And that cutie little tray is DIY, too. Remember this creepy little guy?

Well, he's broken. When I was taking him out to burn him, the frame shattered. Probably because it was framed in 1978 and fragile. So I robbed an old poster of its frame and did what I set out to do in the first place. Just paint the frame, frame a piece of fabric and you're done, sir, done!

And what did I do with our original coffee table, you ask?

It's greeting guests in our foyer, thanks to a World Market run. I'm not sure how I feel about those pillows just yet, but go with it. Maybe I'll cover them with (sshhh!!) Fall fabric :)

Tuesday, August 24, 2010

the big reveal: my FAB living room

It's finally here, eeeeeeks! I really, really can't believe that after living here for three months, the living room is finished. And it's exactly what I didn't know I wanted. It's a big deal to me because in our first place, I thought decorating meant painting and hanging pictures on the wall. And a coffee table book. Always, have a coffee table book.

In our second house, I was waaay unmotivated and was like, psssshhhhh why should I decorate again? Then my hubby left me for 12 weeks for Navy OCS and I just wanted to eat cheetos and watch bad reality TV. So in a semi-sappy/sentimental kind of way, this represents a new era. A new, improved, happy and un-husbandless [go with it] life and living room.

Okay, enough of that junk :) Let's get to the pictures, yesssss. Those spider mums were an unexpected gift from a certain boy. Just in time to add a little flair to my new room. Thanks, boo. No really, here we go...


Everybody now....ooooohhhh, aaaaaaahhhhh. Isn't this the happiest living room you ever did see?
[If I was being critical, I would say that I probably need some kind of window treatment in here. But for now, I'm loving to light-brightness of this set up.]

Hey cuties. You adorable shutters and you spunky fabric art, you.

DIY ottoman. With a picture-frame/fabric-turned-tray. XOXO. And you'll notice that these couches are white. So long, black darkness. Hellooooo, cheapo slipcovers from IKEA. And by cheapo, I mean two for the price of one divided by two [on ebay, honey].

Oh happy day. You can't totally see it, but there's a sofa table behind the couch. I'm loving this. It gives the room some depth and it's just three pieces of wood. [a la TDC]

And of course, the details make this room. I made the black and white pillow [and subsequently decided that pillow-making with a sewing machine that's on the fritz is not.for.me] and the green ruffly one I got for approx. $12 at TJ Maxx. Oh yes I did.

One more time...

Yay :)

Monday, August 23, 2010

weekend recap: sweet shutters

Napoleon Dynamite's definition of sweet. Like, saaaa-weet shutters. I made a secret decision not to spend any money this weekend, because I maybe want to save my monies for a Hobby Lobby stock-up-for-fall trip. Maybe. But then we just had to go to the Habitat Restore to see if they had any plywood for another project. And they happened to have these shutters and they just spoke to me. They spoke to me, I tell you.

I've been spending a lot of time trying to figure out what to do with our mantel. I've always had a painting hanging over it - a wedding gift from my in-laws. I love that painting, but I wanted something a little more unexpected. And it looks better in the dining room here anyway :)

But in all of my "mantel decor" google searches, I didn't find a single thing that I loved so much that I wanted to copy it I felt inspired. It was either too traditional or too modern or too bold or too boring or too not me. [I did, however, make note of several Christmas mantels. Yesssssss.] So I stuck with my lantern and some greenery, and my spray-painted mirror. And I told myself that I could live with it.

I didn't hate it. It just didn't feel bold enough - it felt too pastel and bland compared to the rest of what I have going on in here.

But in all of my mantel searches, there was one thing that kept jumping out at me: two, vertical panel-like objects [i.e. art prints, shutters, molding] placed side-by-side on the mantel. I love it. I gravitate toward symmetry but this isn't candles on either side of a mirror and I love the non-traditional twist.


So when I spotted these two weathered and worn black shutters (for $6 each) perched in the corner at the Habitat Restore, my mantel vision finally came together. I stood there, staring at the shutters, imagining them in my living room.


I imagined them decorated for Christmas [never a good sign] and I even tuned out the creepy Habitat worker man who told me that they were "Charleston Green." No, honey. That's black, but thank you. And please leave me alone so I can figure out how to string Christmas lights around these.


Oh, I just love them. They COMPLETE this room. This pic doesn't even do it justice, but they're perfect.

Pitter-pat, pitter-pat.


I'm linking up to a partaaaay:
Making

Thursday, August 19, 2010

it's all in the details

And we continue with the Tour de Page's Living Room. My most favorite thing about decorating is to have little pieces of flair scattered about that you only notice when you take the time to scan the room. Things that are sentimental to you, but may seem random to others. So they say, "What's that ____ over there" and you say, "Oh, that was from when we ____." Or you just got it at Goodwill for $1, whatever. Go with it.

Like that pic on our side table: it's one of our engagement pictures from the days of yore, that was on display at our rehearsal dinner. We're on the campus of our Alma Mater (Go Heels!) and I love how adorable the look on that boy's face is.

So here we are, almost 3 months moved-in, and I've finally collected enough "details" to call my living room complete (for now!)

This was a cheapo mirror that I found at TJ Maxx for ohhhhh $12? TACKY frame, spiffed right up with some brushed nickel spray paint.


I got these succulents at IKEA during my semi-annual trip for $3 a piece. The ugly plastic planter got a little facelift with some scrap fabric and ribbon.


Also from IKEA, the bamboo that I haven't killed yet. Yesssss.


$0.50 Goodwill frame with some pretty scrap fabric.


Dollar Tree birds, spray painted white. They're in loooove.


And now begins my obsession with throw pillows. I made the two that are the same and decided that I didn't want to make any more :) The others came from TJ Maxx for $10/each. Hollerrr.


I love every.single.thing about this pillow. World Market = $15.


And I got two of these cuties, also at TJ Maxx for $10.

So that's that. I have a little bare wall left that needs some attention and I'm thinking about framing some scrapbook paper? I'm all about cheap unexpected art.

Oh I just love it in here :)

Wednesday, August 18, 2010

wall art. for $7/yard

Okay, listen. I know this pic has nothing to do with anything in this post but it is hi.lar.ious. We were downtown two weekends ago when
my sister-in-law was in town and right as we were approaching the Battery, we noticed this window with all of the junk piled in it. I mean, really. Inflatable bowling pins? That is junk. And I thought, "Whoa, if I had an apartment on the Battery, across the street from these mansions, where bajillions of people walk every day, I would at least close the blinds." Then we got closer and saw the label on the box...Pirate Stuff. Classic. I keep thinking about it and it just cracks me up! When I die, I don't want people to come in my house and find a box of pirate stuff. Unless it's with my halloween decorations or something. And I'd at least hide it in the attic.

But I digress. Let's talk about the wonky wall in our living room. The wall opposite of where our couch sits [where the TV goes, duh] is not the same length as the couch wall. Because the fireplace sits at an angle. See?


And so, in addition to horrific lighting in this pic and the lack of any decoration because [insert good excuse here] and the school desk off to the side that is now a nightstand [before and after, coming right up!] and the rug that I decided I don't like, you'll notice that this wall is wonky.

When you're sitting on the couch, you're centered with the TV, but the TV isn't centered with the wall. And if you hang art above the TV and center it on the wall or [over the TV], it looks wonky because it's not centered with the couch wall. And if you hang multiple pictures to take up more space, it still creates a visual center that makes the wall look....? Wonky, yes.

Solution? Something big.
Problem? Big = lots-o-dollars

So after an evening of - literally - staring at a blank wall and discussing our options, we went from "What if we bought a canvas and painted it?" to "What if we made a canvas a painted it, a la David Bromstad?" to "I'm not an artist so what if we covered the canvas with fabric?" to "What if we just built a frame and stretched fabric over it?"

BAMMMMM. A star is born.

We were going to get the lumber for the frame at Habitat, but it's hard to find wood in good shape there. So we headed to Lowes in search of high-quality 2x4's. Trust me - don't buy something that is flawed or warped because it won't hang flat on the wall.

Have your sweetie build the frame [or do it yourself if you're feeling sassy], reinforcing the corners with L-brackets. Like so:


Then bust out your staple gun. Lay the fabric down, place the frame over it and get busy. I found that it was easier to do the middle of each side and then go all the way around because you can stretch it tighter that way. And please, people...iron the fabric first. You cannot iron it after the fact. I may or may not know this from first hand experience.

We drilled some screws in the wall and hung that sucker right on up there.

I'msohappyI'msohappyI'msohappy

I've lusted after this fabric since the day I spotted it in IKEA, but didn't think I'd ever find something to use it on. Oh, but there it is. All beautiful and hanging in my living room. Don't you love it?


And all for about $25. Not too shabby :)
Related Posts with Thumbnails